We suck at meetings

I’ve worked as a software engineer, manager, consultant, and business owner. All of these jobs have involved meetings. What those meetings look like has varied greatly.

As an engineer, meetings typically entailed technical conversations with peers, one-on-ones with managers, and planning meetings or demos with stakeholders.

As a manager, these looked more like quarterly goal-setting with engineering leadership, one-on-ones with direct reports, and decision-making discussions with the team.

As a consultant, my day often consists of talking to clients to provide input and guidance, communicating with partners to develop leads and strategize on accounts, and meeting with sales prospects to land new deals.

As a business owner, I am in conversations with attorneys and accountants regarding legal and financial matters, with advisors and brokers for things like employee benefits and health insurance, and with my co-owner Robert to discuss items relating to business operations.

What I’ve come to realize is this: we suck at meetings. We’re really bad at them. After starting my first job out of college, I quickly discovered that everyone’s just winging it when it comes to meetings. We’re winging it in a way the likes of which Dilbert himself would envy. We’re so bad at it that it’s become a meme in the corporate world. Whether it’s joking about your lack of productivity due to the number of meetings you have or that one meeting that could have been an email, we’ve basically come to terms with the fact that most meetings are just not very good.

And who’s to blame? There’s no science to meetings. It’s not something they teach you in school. Everyone just shows up and sort of finds a system that works—or doesn’t work—for them. What’s most shocking to me, however, is that meetings are one of the most expensive things a business can do—like billions-of-dollars expensive. If you’re going to pay a bunch of people a lot of money to talk to other people who you’re similarly paying a lot of money, you probably want that talking to be worthwhile, right? And yet here we are, jumping from one meeting to the next, unable to even process what was said in the last one. It’s become an inside joke that every company is in on.

But meetings are also important. They’re where collaboration happens, where ideas are born, where decisions are made. Is being “good at meetings” a legitimate hiring criteria? Should it be?

From all of the meetings I’ve had across these different jobs, I’ve learned that the biggest difference throughout is that of the role played in the meeting. In some cases, it’s The Spectator—there mostly to listen and maybe ask questions. In other cases, it’s playing the role of The Advisor—actively participating in the meeting but mostly in the form of offering advice and guidance. Sometimes it’s The Facilitator, who helps move the agenda along, captures notes, and keeps track of action items or decisions. It might be the Decision Maker, who’s there to decide which way to go and be the tie breaker.

Whatever the role, I’ve consistently struggled with how to insert the most value into meetings and extract the most value out of them. This is doubly so when your job revolves around people, which I didn’t recognize until I became a manager and, later, consultant. In these roles, your calendar is usually stacked with meetings, often with different groups of people across many different contexts. A software engineer’s work happens outside of meetings, but for a manager or consultant, it revolves around what gets done during and after meetings. This is true of a lot of other roles as well.

I’ve always had a vague sense for how to do meetings effectively—have a clear purpose or desired outcome, gather necessary context and background information, include an agenda, invite only the people you need, be present and engaged in the discussion, document the action items and decisions, follow up. The problem is I’ve never had a system for doing it that wasn’t just ad hoc and scattered. Also, most of these things happen outside of the conference room or Zoom call, and who has the time to do all of that when your schedule looks like a Dilbert calendar? All of it culminates in a feeling of severe meeting fatigue.

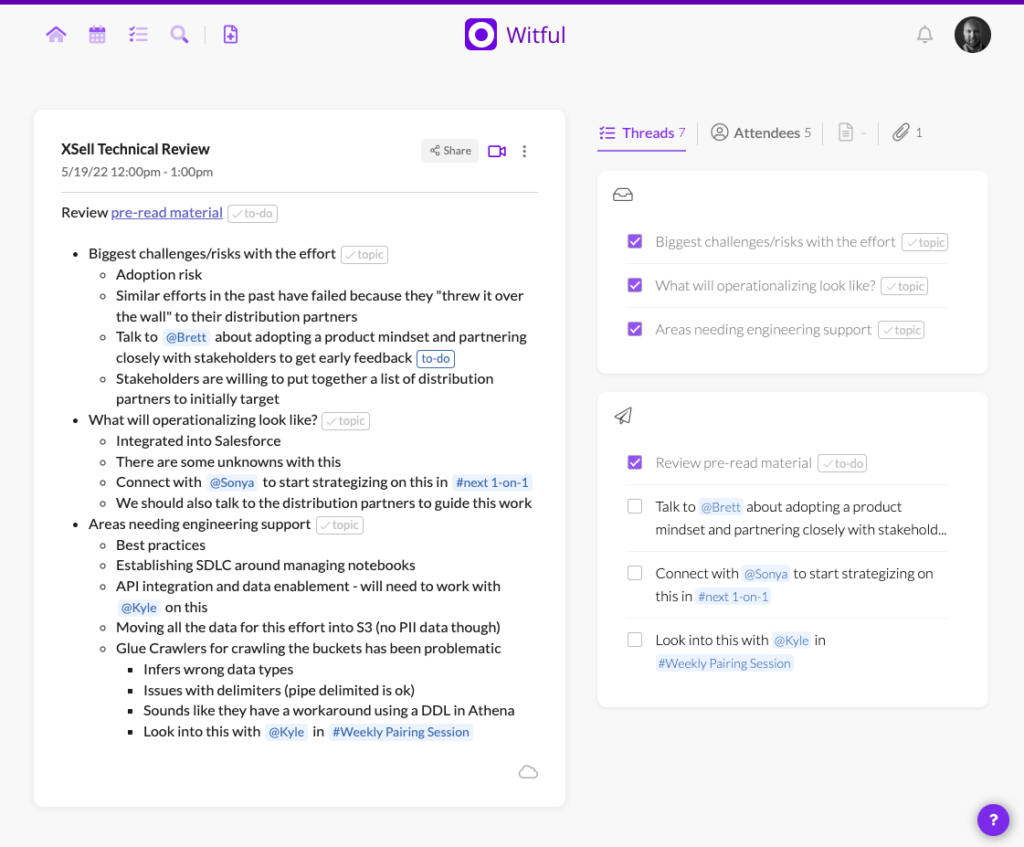
That’s when it occurred to us: what if meetings could be good? Shortly after starting Real Kinetic, we began to explore this question, but the idea had been rattling around our heads long before that. And so we started to develop a solution, first by building a prototype on nights and weekends, then later by investing in it as a full-fledged product. We call it Witful—a note-taking app that connects to your calendar. It’s deceptively simple, but its mission is not: make meetings suck less.

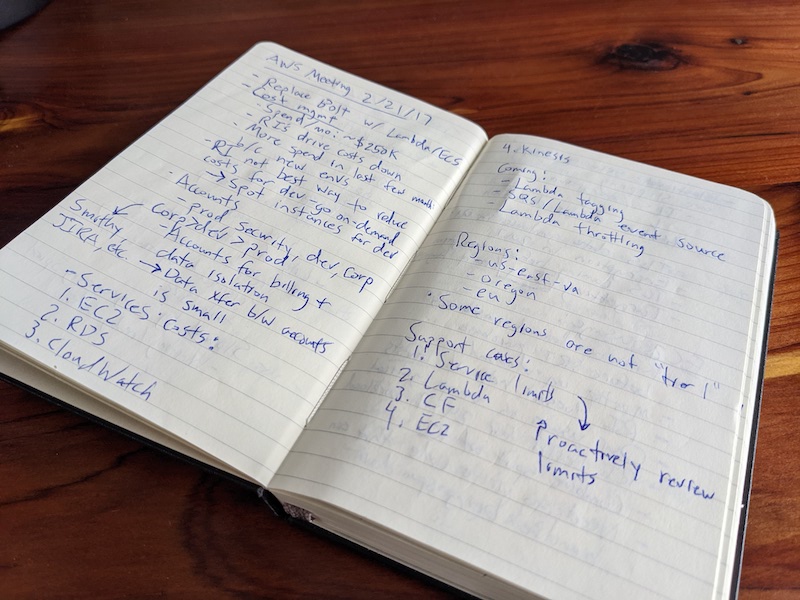
Most calendar and note-taking apps focus on time. After all, what’s the first thing we do when we create a meeting? We schedule it. When it comes to meetings, time is important for logistical purposes—it’s how we know when we need to be somewhere. But the real value of meetings is not time, it’s the people and discussion, decisions, and action items that result. This is what Witful emphasizes by creating a network of all these relationships. It’s less an extension of your notebook and calendar and—forgive the cliche—more like an extension of your brain. It’s a more natural way to organize the information around your work.

We’re still early on this journey, but the product is evolving quickly. We’ve also been clear from the start: Witful isn’t for everyone. If your day is not run by your calendar, it might not be for you. If your role doesn’t center around managing people or maintaining relationships, it might not be for you. Our focus right now is to make you better at meetings. We want to give you the tools and resources you need to conquer your calendar and look good doing it. We use Witful every day to make our consulting work more manageable at Real Kinetic. And while we’re focused on empowering the individual today, our eyes are set towards making teams better at meetings too.

We don’t want to change the way people work, we want to help them do their best work. We want to make meetings suck less. Come join us.

Getting big wins with small teams on tight deadlines

Part of what we do at Real Kinetic is give companies confidence to ship software in the cloud. Many of our clients are large organizations that have been around for a long time but who don’t always have much experience when it comes to cloud. Others are startups and mid-sized companies who may have some experience, but might just want another set of eyes or are looking to mature some of their practices. Whatever the case, one of the things we frequently talk to our clients about is the value of both serverless and managed services. We have found that these are critical to getting big wins with small teams on tight deadlines in the cloud. Serverless in particular has been key to helping clients get some big wins in ways others didn’t think possible.

We often get pulled into a company to help them develop and launch new products in the cloud. These are typically high-profile projects with tight deadlines. These deadlines are almost always in terms of months, usually less than six. As a result, many of the executives and managers we talk to in these situations are skeptical of their team’s ability to execute on these types of timeframes. Whether it’s lack of cloud experience, operations and security concerns, compliance issues, staffing constraints, or some combination thereof, there’s always a reason as to why it can’t be done.

And then, some months later, it gets done.

Mental Model of the Cloud

The skepticism is valid. Often people’s mental model of the cloud is something like this:

A subset of typical cloud infrastructure concerns

More often than not, this is what cloud infrastructure looks like. In addition to what’s shown, there are other concerns. These include things like managing backups and disaster recovery, multi-zone or regional deployments, VM images, and reserved instances. It can be deceiving because simply getting an app running in this environment isn’t terribly difficult, and most engineers will tell you that—these are the “day-one” costs. But engineers don’t tend to be the best at giving estimates while still undervaluing their own time. The minds of most seasoned managers, however, will usually go to the “day-two” costs—what are the ongoing maintenance and operations costs, the security and compliance considerations, and the staffing requirements? This is why we consistently see so much skepticism. If this is also your initial foray into the cloud, that’s a lot of uncertainty! A manager’s job, after all, is to reduce uncertainty.

We’ve been there. We’ve also had to manage those day-two costs. I’ve personally gone through the phases of building a complex piece of software in the cloud, having to maintain one, having to manage a team responsible for one, and having to help a team go through the same process as an outside consultant. Getting that perspective has helped me develop an appreciation for what it really means to ship software. It’s why we like to take a different tack at Real Kinetic when it comes to cloud.

We are big on picking a cloud platform and going all-in on it. Whether it’s AWS, GCP, or Azure—pick your platform, embrace its capabilities, and move on. That doesn’t mean there isn’t room to use multiple clouds. Some platforms are better than others in different areas, such as data analytics or machine learning, so it’s wise to leverage the strengths of each platform where it makes sense. This is especially true for larger organizations who will inevitably span multiple clouds. What we mean by going “all-in” on a platform, particularly as it relates to application development, is sidestepping the trap that so many organizations fall intohedging their bets. For a variety of reasons, many companies will take a half measure when adopting a cloud platform by avoiding things like managed services and serverless. Vendor lock-in is usually at the top of their list of concerns. Instead, they end up with something akin to the diagram above, and in doing so, lose out on the differentiated benefits of the platform. They also incur significantly more day-two costs.

The Value and Cost of Serverless

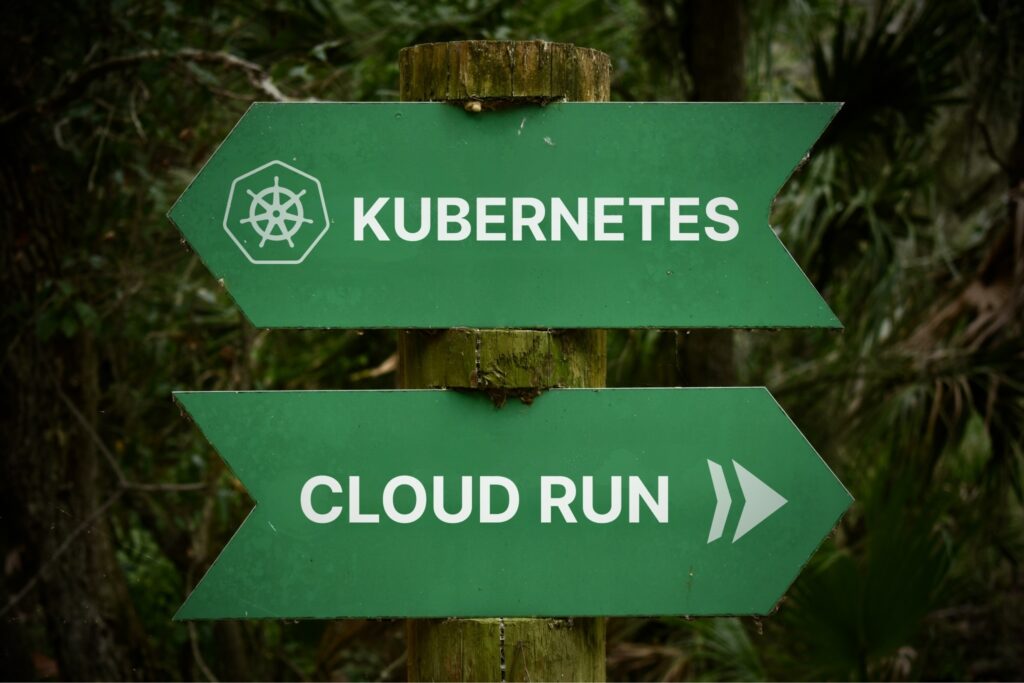
We spend a lot of time talking to our clients about this trade-off. With managers, it usually resonates when we ask if they want their people focusing on shipping business value or doing commodity work. With engineers, architects, or operations folks, it can be more contentious. On more than a few occasions, we’ve talked clients out of using Kubernetes for things that were well-suited to serverless platforms. Serverless is not the right fit for everything, but the reality is many of the workloads we encounter are primarily CRUD-based microservices. These can be a good fit for platforms like AWS Lambda, Google App Engine, or Google Cloud Run. The organizations we’ve seen that have adopted these services for the correct use cases have found reduced operations investment, increased focus on shipping things that matter to the business, accelerated delivery of new products, and better cost efficiency in terms of infrastructure utilization.

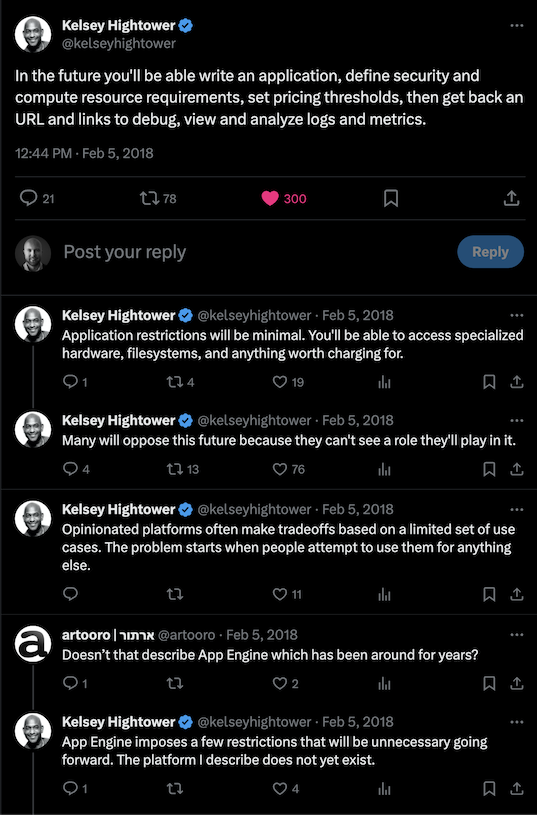
If vendor lock-in is your concern, it’s important to understand both the constraints and the trade-offs. Not all serverless platforms are created equal. Some are highly opinionated, others are not. In the early days, Google App Engine was highly opinionated, requiring you to use its own APIs to build your application. This meant moving an application built on App Engine was no small feat. Today, that is no longer the case; the new App Engine runtimes allow you to run just about any application. Cloud Run, a serverless container platform, allows you to deploy a container that can run anywhere. The costs are even less. On the other hand, using a serverless database like Cloud Firestore or DynamoDB requires using a proprietary API, but APIs can be abstracted.

In order to decide if the trade-off makes sense, you need to determine three things:

  1. What is the honest likelihood you’ll need to move in the future?
  2. What are the switching costs—the amount of time and effort needed to move?
  3. What is the value you get using the solution?

These are not always easy things to determine, but the general rule is this: if the value you’re getting offsets the switching costs times the probability of switching—and it often does—then it’s not worth trying to hedge your bet. There can be a lot of hidden considerations, namely operations and development overhead and opportunity costs. It can be easy to forget about these when making a decision. In practice, vendor lock-in tends to be less about code portability and more about capability lock-in—think things like user management, Identity and Access Management, data management, cloud-specific features and services, and so forth. These are what make switching hard, not code.

Another concern we commonly hear with serverless is cost. In our experience, however, this is rarely an issue for appropriate use cases. While serverless can be more expensive in terms of cloud spend for some situations, this cost is normally offset by the reduced engineering and ongoing operations costs. Using serverless and managed services for the right things can be quite cost-effective. This may not always hold true, such as for large organizations who can negotiate with providers for committed cloud spend, but for many cases it makes sense.

Serverless isn’t just about compute. While people typically associate serverless with things like Lambda or Cloud Functions, it actually extends far beyond this. For example, in addition to its serverless compute offerings (Cloud Run, Cloud Functions, and App Engine), GCP has serverless storage (Cloud Storage, Firestore, and Datastore), serverless integration components (Cloud Tasks, Pub/Sub, and Scheduler), and serverless data and machine learning services (BigQuery, AutoML, and Dataflow). While each of these services individually offers a lot of value, it’s not until we start to compose them together in different ways where we really see the value of serverless appear.

Serverless vs. Managed Services

Some might consider the services I mentioned above “managed services”, so let me clarify that. We generally talk about “serverless” being the idea that the cloud provider fully manages and maintains the server infrastructure. This means the notion of “managed services” and “serverless” are closely related, but they are also distinct.

A serverless product is also managed, but not all managed services are serverless. That is to say, serverless is a subset of managed services.

Serverless means you stop thinking about the concept of servers in your architecture. This broadly encompasses words like “servers”, “instances”, “nodes”, and “clusters.” Continuing with our GCP example, these words would be associated with products like GKE, Dataproc, Bigtable, Cloud SQL, and Spanner. These services are decidedly not serverless because they entail some degree of managing and configuring servers or clusters, even though they are managed services.

Instead, you start thinking in terms of APIs and services. This would be things like Cloud Functions, Dataflow, BigQuery, Cloud Run, and Firestore. These have no servers or clusters. They are simply APIs that you interact with to build your applications. They are more specialized managed services.

Why does this distinction matter? It matters because of the ramifications it has for where we invest our time. Managing servers and clusters is going to involve a lot more operations effort, even if the base infrastructure is managed by the cloud provider. Much of this work can be considered “commodity.” It is not work that differentiates the business. This is the trade-off of getting more control—we take on more responsibility. In rough terms, the managed services that live outside of the serverless circle are going to be more in the direction of “DevOps”, meaning they will involve more operations overhead. The managed services inside the serverless circle are going to be more in the direction of “NoOps”. There is still work involved in using them, but the line of responsibility has moved upwards with the cloud provider responsible for more. We get less control over the infrastructure, but that means we can focus more on the business outcomes we develop on top of that infrastructure.

In fairness, it’s not always a black-and-white determination. Things can get a little blurry since serverless might still provide some degree of control over runtime parameters like memory or CPU, but this tends to be limited in comparison to managing a full server. There might also be some notion of “instances”, as in the case of App Engine, but that notion is much more abstract. Finally, some services appear to straddle the line between managed service and serverless. App Engine Flex, for instance, allows you to SSH into its VMs, but you have no real control over them. It’s a heavily sandboxed environment.

Why Serverless?

Serverless enables focusing on business outcomes. By leveraging serverless offerings across cloud platforms, we’ve seen product launches go from years to months (and often single-digit months). We’ve seen release cycles go from weeks to hours. We’ve seen development team sizes go from double digits to a few people. We’ve seen ops teams go from dozens of people to just one or two. It’s allowed these people to focus on more differentiated work. It’s given small teams of people a significant amount of leverage.

It’s no secret. Serverless is how we’ve helped many of our clients at Real Kinetic get big wins with small teams on tight deadlines. It’s not always the right fit and there are always trade-offs to consider. But if you’re not at least considering serverless—and more broadly, managed services—then you’re not getting the value you should be getting out of your cloud platform. Keep in mind that it doesn’t have to be all or nothing. Find the places where you can leverage serverless in combination with managed services or more traditional infrastructure. You too will be surprising and impressing your managers and leadership.

Continuous Deployment for AWS Glue

AWS Glue is a managed service for building ETL (Extract-Transform-Load) jobs. It’s a useful tool for implementing analytics pipelines in AWS without having to manage server infrastructure. Jobs are implemented using Apache Spark and, with the help of Development Endpoints, can be built using Jupyter notebooks. This makes it reasonably easy to write ETL processes in an interactive, iterative fashion. Once finished, the Jupyter notebook is converted into a Python script, uploaded to S3, and then run as a Glue job.

There are a number of steps involved in doing this, so it can be worthwhile to automate the process into a CI/CD pipeline. In this post, I’ll show you how you can build an automated pipeline using GitHub Actions to do continuous deployment of Glue jobs built on PySpark and Jupyter notebooks. The full code for this demo is available on GitHub.

The Abstract Workflow

First, I’m going to assume you already have a notebook for which you’d like to set up continuous deployment. If you don’t, you can take a look at my example, but keep in mind you’ll need to have the appropriate data sources and connections set up in Glue for it to work. This post won’t be focusing on the ETL script itself but rather the build and deployment pipeline for it.

I recommend treating your Jupyter notebooks as the “source code” for your ETL jobs and treating the resulting Python script as the “build artifact.” Though this can present challenges for diffing, I find providing the notebook from which the code was derived makes the development process easier, particularly when collaborating with other developers. Additionally, GitHub has good support for rendering Jupyter notebooks, and there is tooling available for diffing notebooks, such as nbdime.

With that in mind, the general flow of our deployment pipeline looks something like this:

  1. Upon new commits to master, generate a Python script from the Jupyter notebook.
  2. Copy the generated Python script to an S3 bucket.
  3. Update a Glue job to use the new script.

You might choose to run some unit or integration tests for your script as well, but I’ve omitted this for brevity.

The Implementation

As I mentioned earlier, I’m going to use GitHub Actions to implement my CI/CD pipeline, but you could just as well use another tool or service to implement it. Actions makes it easy to automate workflows and it’s built right into GitHub. If you’re already familiar with it, some of this will be review.

In our notebook repository, we’ll create a .github/workflows directory. This is where GitHub Actions looks for workflows to run. Inside that directory, we’ll create a main.yml file for defining our CI/CD workflow.

First, we need to give our workflow a name. Our pipeline will simply consist of two jobs, one for producing the Python script and another for deploying it, so I’ll name the workflow “build-and-deploy.”

name: build-and-deploy

Next, we’ll configure when the workflow runs. This could be on push to a branch, when a pull request is created, on release, or a number of other events. In our case, we’ll just run it on pushes to the master branch.

on:
  push:
    branches: [ master ]

Now we’re ready to define our “build” job. We will use a tool called nbconvert to convert our .ipynb notebook file into an executable Python script. This means our build job will have some setup. Specifically, we’ll need to install Python and then install nbconvert using Python’s pip. Before we define our job, we need to add the “jobs” section to our workflow file:

# A workflow run is made up of one or more jobs that can run
# sequentially or in parallel.
jobs:

Here we define the jobs that we want our workflow to run as well as their order. Our build job looks like the following:

build:
  runs-on: ubuntu-latest

  steps:
    # Checks-out your repository under $GITHUB_WORKSPACE, so your
    # job can access it
    - uses: actions/checkout@v2
        
    - name: Set up Python 3.8
      uses: actions/setup-python@v2
      with:
        python-version: '3.8'
          
    - name: Install nbconvert
      run: |
        python -m pip install --upgrade pip
        pip install nbconvert

    - name: Convert notebook
      run: jupyter nbconvert --to python traffic.ipynb

    - name: Upload python script
      uses: actions/upload-artifact@v2
      with:
        name: traffic.py
        path: traffic.py

The “runs-on” directive determines the base container image used to run our job. In this case, we’re using “ubuntu-latest.” The available base images to use are listed here, or you can create your own self-hosted runners with Docker. After that, we define the steps to run in our job. This consists of first checking out the code in our repository and setting up Python using built-in actions.

Once Python is set up, we pip install nbconvert. We then use nbconvert, which works as a subcommand of Jupyter, to convert our notebook file to a Python file. Note that you’ll need to specify the correct .ipynb file in your repository—mine is called traffic.ipynb. The file produced by nbconvert will have the same name as the notebook file but with the .py extension.

Finally, we upload the generated Python file so that it can be shared between jobs and stored once the workflow completes. This is necessary because we’ll need to access the script from our “deploy” job. It’s also useful because the artifact is now available to view and download from the workflow run, including historical runs.

Now that we have our Python script generated, we need to implement a job to deploy it to AWS. This happens in two steps: upload the script to an S3 bucket and update a Glue job to use the new script. To do this, we’ll need to install the AWS CLI tool and configure credentials in our job. Here is the full deploy job definition, which I’ll talk through below:

deploy:
  needs: build
  runs-on: ubuntu-latest

  steps:
    - name: Download python script from build
      uses: actions/download-artifact@v2
      with:
        name: traffic.py
          
    - name: Install AWS CLI
      run: |
        curl "https://awscli.amazonaws.com/awscli-exe-linux-x86_64.zip" -o "awscliv2.zip"
        unzip awscliv2.zip
        sudo ./aws/install
          
    - name: Set up AWS credentials
      shell: bash
      env:
        AWS_ACCESS_KEY_ID: ${{ secrets.AWS_ACCESS_KEY_ID }}
        AWS_SECRET_ACCESS_KEY: ${{ secrets.AWS_SECRET_ACCESS_KEY }}
      run: |
        mkdir -p ~/.aws
        touch ~/.aws/credentials
        echo "[default]
        aws_access_key_id = $AWS_ACCESS_KEY_ID
        aws_secret_access_key = $AWS_SECRET_ACCESS_KEY" > ~/.aws/credentials
          
    - name: Upload to S3
      run: aws s3 cp traffic.py s3://${{secrets.S3_BUCKET}}/traffic_${GITHUB_SHA}.py --region us-east-1
      
    - name: Update Glue job
      run: |
        aws glue update-job --job-name "Traffic ETL" --job-update \
"Role=AWSGlueServiceRole-TrafficCrawler,Command={Name=glueetl,ScriptLocation=s3://${{secrets.S3_BUCKET}}/traffic_${GITHUB_SHA}.py},Connections={Connections=redshift}" \
--region us-east-1
      
    - name: Cleanup
      run: rm -rf ~/.aws

We use “needs: build” to specify that this job depends on the “build” job. This determines the order in which jobs are run. The first step is to download the Python script we generated in the previous job.

Next, we install the AWS CLI using the steps recommended by Amazon. The AWS CLI relies on credentials in order to make API calls, so we need to set those up. For this, we use GitHub’s encrypted secrets which allow you to store sensitive information within your repository or organization. This prevents our credentials from leaking into code or workflow logs. In particular, we’ll use an AWS access key to authenticate the CLI. In our notebook repository, we’ll create two new secrets, AWS_ACCESS_KEY_ID and AWS_SECRET_ACCESS_KEY, which contain the respective access key tokens. Our workflow then injects these into an ~/.aws/credentials file, which is where the AWS CLI looks for credentials.

With our credentials set up, we can now use the CLI to make API calls to AWS. The first thing we need to do is copy the Python script to an S3 bucket. In the workflow above, I’ve parameterized this using a secret called S3_BUCKET, but you could also just hardcode this or parameterize it using a configuration file. This bucket acts as a staging directory for our Glue scripts. You’ll also notice that I append the Git commit SHA to the name of the file uploaded to S3. This way, you’ll know exactly what version of the code the script contains and the bucket will retain a history of each script. This is useful when you need to debug a job or revert to a previous version.

Once the script is uploaded, we need to update the Glue job. This requires the job to be already bootstrapped in Glue, but you could modify the workflow to update the job or create it if it doesn’t yet exist. For simplicity, we’ll just assume the job is already created. Our update command specifies the name of the job to update and a long –job-update string argument that looks like the following:

Role=AWSGlueServiceRole-TrafficCrawler,Command={Name=glueetl,ScriptLocation=s3://${{secrets.S3_BUCKET}}/traffic_${GITHUB_SHA}.py},Connections={Connections=redshift}

This configures a few different settings on the job, two of which are required. “Role” sets the IAM role associated with the job. This is important since it determines what resources your Glue job can access. “Command” sets the job command to execute, which is basically whether it’s a Spark ETL job (“glueetl”), Spark Streaming job (“gluestreaming”), or a Python shell job (“pythonshell”). Since we are running a PySpark job, we set the command name to “glueetl” and then specify the script location, which is the path to our newly uploaded script. Lastly, we set a connection used by the job. This isn’t a required parameter but is important if your job accesses any Glue data catalog connections. In my case, that’s a Redshift database connection I’ve created in Glue, so update this accordingly for your job. The Glue update-job command is definitely the most unwieldy part of our workflow, so refer to the documentation for more details.

The last step is to remove the stored credentials file that we created. This step isn’t strictly necessary since the job container is destroyed once the workflow is complete, but in my opinion is a good security hygiene practice.

Now, all that’s left to do is see if it works. To do this, simply commit the workflow file which should kick off the GitHub Action. In the Actions tab of your repository, you should see a running workflow. Upon completion, the build job output should look something like this:

And the deploy output should look something like this:

At this point, you should see your Python script in the S3 bucket you configured, and your Glue job should be pointing to the new script. You’ve successfully deployed your Glue job and have automated the process so that each new commit will deploy a new version! If you wanted, you could also extend this workflow to start the new job or create a separate workflow that runs on a set schedule, e.g. to kick off a nightly batch ETL process.

Hopefully you’ve found this useful for automating your own processes around AWS Glue or Jupyter notebooks. GitHub Actions provides a convenient and integrated solution for implementing CI/CD pipelines. With it, we can build a nice development workflow for getting Glue ETL code to production with continuous deployment.

Implementing ETL on GCP

ETL (Extract-Transform-Load) processes are an essential component of any data analytics program. This typically involves loading data from disparate sources, transforming or enriching it, and storing the curated data in a data warehouse for consumption by different users or systems. An example of this would be taking customer data from operational databases, joining it with data from Salesforce and Google Analytics, and writing it to an OLAP database or BI engine.

In this post, we’ll take an honest look at building an ETL pipeline on GCP using Google-managed services. This will primarily be geared towards people who may be familiar with SQL but may feel less comfortable writing code or building a solution that requires a significant amount of engineering effort. This might include data analysts, data scientists, or perhaps more technical-oriented business roles. That is to say, we’re mainly looking at low-code/no-code solutions, but we’ll also touch briefly on more code-heavy options towards the end. Specifically, we’ll compare and contrast Data Fusion and Cloud Dataprep. As part of this, we will walk through the high-level architecture of an ETL pipeline and discuss common patterns like data lakes and data warehouses.

General Architecture

It makes sense to approach ETL in two phases. First, we need a place to land raw, unprocessed data. This is commonly referred to as a data lake. The data lake’s job is to serve as a landing zone for all of our business data, even if the purpose of some of that data is not yet clear. The data lake is also where we can de-identify or redact sensitive data before it moves further downstream.

The second phase is processing the raw data and storing it for particular use cases. This is referred to as a data warehouse. The data here feeds end-user queries and reports for business analysts, BI tools, dashboards, spreadsheets, ML models, and other business activities. The data warehouse structures the data in a way suitable for these specific needs.

On GCP, our data lake is implemented using Cloud Storage, a low-cost, exabyte-scale object store. This is an ideal place to land massive amounts of raw data. We can also use Cloud Data Loss Prevention (DLP) to alert on or redact any sensitive data such as PII or PHI. Once use cases have been identified for the data, we then transform it and move it into our curated data warehouse implemented with BigQuery.

At a high level, our analytics pipeline architecture looks something like the following. The components in green are pieces implemented on GCP.

We won’t cover how data gets ingested into the data warehouse. This might be a data-integration tool like Mulesoft or Informatica if we’re moving data from on-prem. It might be an automated batch process using gsutil, a Python script, or Transfer Service. Alternatively, it might be a more real-time push process that streams data in via Cloud Pub/Sub. Either way, we’ll assume we have some kind of mechanism to load our data into Cloud Storage.

We will focus our time discussing the “Transform Process” step in the diagram above. This is where Data Fusion and Cloud Dataprep fit in.

Data Fusion

Data Fusion is a code-free data integration tool that runs on top of Hadoop. The user is intended to define ETL pipelines using a graphical plug-and-play UI with preconfigured connectors and transformations. Data Fusion is actually a managed version of an open source system called Cask Data Analytics Platform (CDAP) which Google acquired in 2018. It’s a relatively new product in GCP, and it shows. The UX is rough and there are a lot of sharp edges. For example, when an instance starts up, you can occasionally hit cryptic errors because the instance has not actually initialized fully. Case in point, try deciphering what this error means:

The theory of letting users with no programming experience implement and run ETL pipelines is appealing. However, the reality is that you will end up trying to understand Hadoop debug logs and opaque error messages when things go wrong, which happens frequently.

The pipelines created in Data Fusion run on Cloud Dataproc. This means every time you run a pipeline, you first need to wait for a Dataproc cluster to spin up—which is slow. Google’s recommendation to speed this up is to configure a runtime profile that uses a pre-existing Dataproc cluster. This has several downsides, one of which is simply the cost of keeping a Dataproc cluster running in addition to your Data Fusion instance. But what is the point of keeping a cluster running that only gets used for nightly batch processes or ad hoc pipeline development? The other is the technical and operations overhead required to configure and manage a cluster. This requires provisioning an appropriately sized cluster, creating an SSH key for it, and adding the key to the cluster so that Data Fusion can connect to it. For a product designed to allow relatively non-technical people to build out pipelines, this is a tall order. You’ll also quickly see how rough the UX is when walking through these steps.

The other downside of Data Fusion is that it’s actually pretty expensive. CDAP consists of a whole bunch of components. When you start a Data Fusion instance, it creates an internal GKE cluster to run all of these components. In addition to this, it relies on Cloud Storage, Cloud SQL, Persistent Disks, Elasticsearch, and Cloud KMS. The net result is that instances take approximately 10-20 minutes to start (now closer to 10 with recent improvements) and, for many, they’re not something you run and forget about.

A Basic Edition instance costs about $1,100 per month, while an Enterprise Edition instance costs $3,000 per month. For larger organizations, that might be a nominal cost, but it stings a bit when you realize that is just the cost to run the pipeline editor. The pipelines themselves run on Dataproc, which is an entirely separate—and significant—line item. What’s worse is that you have to keep the Data Fusion instance running in order to actually execute the ETL pipelines you develop in it. Additionally, the Basic Edition will only let you run pipelines on demand. In order to schedule pipelines or trigger them in a more streaming fashion, you have to use the Enterprise Edition. As a result, I often encounter teams wanting to schedule startup and shutdown for both the Dataproc clusters and Data Fusion instances to avoid unnecessary spend. This has to be done with code.

Data Fusion Pipeline Editor

Pipelines are immutable, which means every time you need to tweak a pipeline, you first have to make a copy of it. Immutability sounds nice in theory, but in practice it means you end up with dozens of pipeline iterations as you build out your process. And in order to save your pipeline when a Data Fusion instance is deleted—say because you’re shutting it down nightly to save on costs—you have to export it to a file and then import it to the new instance. Recycling instances will still lose the job information for previous pipeline runs, however. There is no way to “pause” an instance, which makes pipeline management a pain.

Data Fusion itself is fairly robust in what you can do with it. It can extract data from a broad set of sources, including Cloud Storage, perform a variety of transformations, and load results into an assortment of destinations such as BigQuery. That said, I’m still a bit skeptical about no-code solutions for non-technical users. I still often find myself dropping in a JavaScript transform in order to actually do the manipulations on the data that I need versus trying to do it with a combination of preconfigured drag-and-drop widgets. Most of the analysts I’ve seen using it also just want to use SQL to do their transformations. Trying to join two data sources using a UI is frankly just more difficult than writing a SQL join. The data wrangler uses a goofy scripting language called JEXL that is poorly documented and inconsistently implemented. To put it bluntly, the UI and UX in Data Fusion (technically CDAP) is painful, and I often find myself wishing I could just write some Python. It just feels like an open source product that doesn’t see much investment.

Data Fusion Wrangler

Data Fusion is a bit of an oddball when viewed in the context of how GCP normally approaches services until you realize it was an acquisition of a company built around an open source framework. In that light, it feels very similar to Cloud Composer, another product built around an open source framework, Apache Airflow, which feels equally kludgy. Most of Google’s data products are highly refined with an emphasis on serverless and developer experience. Services like BigQuery, Dataflow, and Cloud Pub/Sub come to mind here. Data Fusion is the polar opposite. It’s clunky, the CDAP infrastructure is heavy and expensive, and it still requires low-level operations like when you’re configuring a Dataproc cluster.

Dataproc itself feels like a service for handling legacy Hadoop workloads since it has a lot of operations overhead. For newer workloads, I would target Dataflow which is closer to a “serverless” experience like BigQuery and is evidently on the roadmap as a runtime target for Data Fusion.

The CDAP UX is quirky, confusing, inconsistent, and generally unpleasant. The moment anything goes awry, which is often and unwittingly the case, you’re thrust into the world of Hadoop to divine what went wrong. I’m a raving fan of much of GCP’s managed services. On the whole, I find them to be better engineered, better thought-out, and better from a developer experience perspective compared to other cloud platforms. Data Fusion ain’t it.

Cloud Dataprep

Cloud Dataprep is actually a third-party application offered by Trifacta through GCP. In fact, it’s really just a GCP-specific SKU of Trifacta’s Wrangler product. The downside of this is that you have to agree to a third-party vendor’s terms and conditions. For some, this will likely trigger a whole separate sourcing process. This is a challenge for a lot of enterprise organizations.

If you can get past the procurement conundrum, you’ll find Dataprep to be a highly polished and refined product. In comparison to Data Fusion, it’s a breath of fresh air and is superior in nearly every aspect. The UI is pleasant, the UX is—for the most part—coherent and intuitive, it’s cheaper, and it’s a proper serverless product. Dataprep feels like what I would expect from a first-class managed service on GCP.

Dataprep Flow Editor

Dataprep is similar to Data Fusion in the sense that it allows you to build out pipelines with a graphical interface which then target an underlying runtime. In the case of Dataprep, it targets Dataflow rather than Dataproc. This means we benefit from the features of Dataflow, namely auto-provisioning and scaling of infrastructure. Jobs tend to run much more quickly and reliably than with Data Fusion. Another key difference is that, unlike Data Fusion, Dataprep doesn’t require an “instance” to develop pipelines. It is more like a SaaS application that relies on Dataflow. Today, using the app to develop pipelines is free of charge. You only incur charges from Dataflow resource usage. Unfortunately, this is changing as Trifacta is switching to a tiered monthly subscription model later this year. This will put base costs more in-line with Data Fusion, but I suspect the reliance on Dataflow will bring overall costs down.

The pipeline management in Dataprep is simpler than in Data Fusion. Pipelines in Dataprep are called “flows.” These are mutable and private by default but can be shared with other users. Because Dataprep is a SaaS product, you don’t need to worry about exporting and persisting your pipelines, and job data from previous flow executions is retained.

Dataprep has some drawbacks though. Broadly speaking, it’s not as feature-rich as Data Fusion. It can only integrate with Cloud Storage and BigQuery, while Data Fusion supports a wide array of data sources and sinks. You can do more with Data Fusion, while with Dataprep, you’re more or less confined to the wrangler. Because of this, Dataprep is well-suited to lighter weight processes and data cleansing—joining data sources, standardizing formats, identifying missing or mismatched values, deduplicating rows, and other things like that. It also works well for data exploration and slicing and dicing.

Dataprep Wrangler

I often find teams using both Data Fusion and Dataprep. Data Fusion gets used for more advanced ETL processes and Dataprep for, well, data preparation. If it’s available to them, teams usually start with Dataprep and then switch to Data Fusion if they hit a wall with what it can do.

Alternatives

Data Fusion and Dataprep attempt to provide a managed solution that lets users with little-to-no programming experience build out ETL pipelines. Dataprep definitely comes closer to realizing that goal due to its more refined UX and reliance on Dataflow rather than Dataproc. However, I tend to dislike managed “workflow engines” like these. Cloud Composer and AWS Glue, which is Amazon’s managed ETL service, are other examples that fall under this category.

These types of services usually sit in a weird in-between position of trying to provide low-code solutions with GUIs but needing to understand how to debug complex and sophisticated distributed computing systems. It seems like every time you try something to make building systems easier, you wind up needing to understand the “easier” thing plus the “hard” stuff it was trying to make easy. This is what Joel Spolsky refers to as the Law of Leaky Abstractions. It’s why I prefer to write code to solve problems versus relying on low-code interfaces. The abstractions can work okay in some cases, but it’s when things go wrong or you need a little bit more flexibility where you run into problems. It can be a touchy subject, but I’ve found that the most effective data programs within organizations are the ones that have software engineers or significant programming and systems development skill sets. This is especially true if you’re on AWS where there’s more operations and networking knowledge required.

With that said, there are some alternative approaches to implementing ETL processes on GCP that move away from the more low/no-code options. If your team consists mostly of software engineers or folks with a development background, these might be a better option.

My go-to for building data processing pipelines is Cloud Dataflow, which is a serverless system for implementing stream and batch pipelines. With Dataflow, you don’t need to think about capacity and resource provisioning and, unlike Data Fusion and Dataproc, you don’t need to keep a standby cluster running as there is no “cluster.” The compute is automatically provisioned and autoscaled for you based on the job. You can use code to do your transformations or use SQL to join different data sources.

ETL Pipeline with Dataflow

For batch ETL, I like a combination of Cloud Scheduler, Cloud Functions, and Dataflow. Cloud Scheduler can kick off the ETL process by hitting a Cloud Function which can then trigger your Dataflow template. Alternatively, you could use a streaming Dataflow pipeline in combination with Cloud Scheduler and Pub/Sub to launch your batch ETL pipelines. Google has an example of this here.

For streaming ETL, data can be fed into a streaming Dataflow pipeline from Cloud Pub/Sub and processed as usual. This data can even be joined with files in Cloud Storage or tables in BigQuery using SQL. This is what I found myself and many of the clients I’ve worked with wanting to do in Data Fusion and Dataprep. Sometimes you just want to write SQL, which leads to another solution.

BigQuery provides a good mechanism for ELT—that is extracting the data from its sources, loading it into BigQuery, and then performing the transformations on it. This is a good option if you’re dealing with primarily batch-driven processes and you have a SQL-heavy team as the transformations are expressed purely through SQL. The transformation queries can either be scheduled directly in BigQuery or triggered in an automated way using the API, such as running the transformations after data loading completes.

ELT Pipeline with BigQuery

I mentioned earlier that I’m not a huge fan of managed workflow engines. This is speaking to high-level abstractions and heavy, monolithic frameworks specifically. However, I am a fan of lightweight, composable abstractions that make it easy to build scalable and fault-tolerant workflows. Examples of this include AWS Step Functions and Google Cloud Tasks. On GCP, Cloud Tasks can be a great alternative to Dataflow for building more code-heavy ETL processes if you’re not tied in to Apache Beam. In combination with Cloud Run, you can build out highly elastic workflows that are entirely serverless. While it’s not the obvious choice for implementing ETL on GCP, it’s definitely worth a mention.

Conclusion

There are several options when it comes to implementing ETL processes on GCP. What the right fit is depends on your team’s skill set, the use cases, and your affinity for certain tools. Cost and operational complexity are also important considerations. In practice, however, it’s likely you’ll end up using a combination of different solutions.

For low/no-code solutions, Data Fusion and Cloud Dataprep are your only real options. While Data Fusion is rough from a usability perspective and generally more expensive, it’s likely where Google is putting significant investment. Dataprep is more refined and cost-effective but limited in capability, and it brings a third-party vendor into the mix. Using BigQuery itself for ELT is also an option for SQL-minded teams. But for teams with a strong engineering background, my recommended starting point is Cloud Dataflow or even Cloud Tasks for certain types of processing work.

Together with Cloud Pub/Sub, Cloud Data Loss Prevention, Cloud Storage, BigQuery, and GCP’s other managed services, these solutions provide a great way to implement analytics pipelines that require minimal operations investment.

Using Google-Managed Certificates and Identity-Aware Proxy With GKE

Ingress on Google Kubernetes Engine (GKE) uses a Google Cloud Load Balancer (GCLB). GCLB provides a single anycast IP that fronts all of your backend compute instances along with a lot of other rich features. In order to create a GCLB that uses HTTPS, an SSL certificate needs to be associated with the ingress resource. This certificate can either be self-managed or Google-managed. The benefit of using a Google-managed certificate is that they are provisioned, renewed, and managed for your domain names by Google. These managed certificates can also be configured directly with GKE, meaning we can configure our certificates the same way we declaratively configure our other Kubernetes resources such as deployments, services, and ingresses.

GKE also supports Identity-Aware Proxy (IAP), which is a fully managed solution for implementing a zero-trust security model for applications and VMs. With IAP, we can secure workloads in GCP using identity and context. For example, this might be based on attributes like user identity, device security status, region, or IP address. This allows users to access applications securely from untrusted networks without the need for a VPN. IAP is a powerful way to implement authentication and authorization for corporate applications that are run internally on GKE, Google Compute Engine (GCE), or App Engine. This might be applications such as Jira, GitLab, Jenkins, or production-support portals.

IAP works in relation to GCLB in order to secure GKE workloads. In this tutorial, I’ll walk through deploying a workload to a GKE cluster, setting up GCLB ingress for it with a global static IP address, configuring a Google-managed SSL certificate to support HTTPS traffic, and enabling IAP to secure access to the application. In order to follow along, you’ll need a GKE cluster and domain name to use for the application. In case you want to skip ahead, all of the Kubernetes configuration for this tutorial is available here.

Deploying an Application Behind GCLB With a Managed Certificate

First, let’s deploy our application to GKE. We’ll use a Hello World application to test this out. Our application will consist of a Kubernetes deployment and service. Below is the configuration for these:

Apply these with kubectl:

$ kubectl apply -f .

At this point, our application is not yet accessible from outside the cluster since we haven’t set up an ingress. Before we do that, we need to create a static IP address using the following command:

$ gcloud compute addresses create web-static-ip --global

The above will reserve a static external IP called “web-static-ip.” We now can create an ingress resource using this IP address. Note the “kubernetes.io/ingress.global-static-ip-name” annotation in the configuration:

Applying this with kubectl will provision a GCLB that will route traffic into our service. It can take a few minutes for the load balancer to become active and health checks to begin working. Traffic won’t be served until that happens, so use the following command to check that traffic is healthy:

$ curl -i http://<web-static-ip>

You can find <web-static-ip> with:

$ gcloud compute addresses describe web-static-ip --global

Once you start getting a successful response, update your DNS to point your domain name to the static IP address. Wait until the DNS change is propagated and your domain name now points to the application running in GKE. This could take 30 minutes or so.

After DNS has been updated, we’ll configure HTTPS. To do this, we need to create a Google-managed SSL certificate. This can be managed by GKE using the following configuration:

Ensure that “example.com” is replaced with the domain name you’re using.

We now need to update our ingress to use the new managed certificate. This is done using the “networking.gke.io/managed-certificates” annotation.

We’ll need to wait a bit for the certificate to finish provisioning. This can take up to 15 minutes. Once it’s done, we should see HTTPS traffic flowing correctly:

$ curl -i https://example.com

We now have a working example of an application running in GKE behind a GCLB with a static IP address and domain name secured with TLS. Now we’ll finish up by enabling IAP to control access to the application.

Securing the Application With Identity-Aware Proxy

If you’re enabling IAP for the first time, you’ll need to configure your project’s OAuth consent screen. The steps here will walk through how to do that. This consent screen is what users will see when they attempt to access the application before logging in.

Once IAP is enabled and the OAuth consent screen has been configured, there should be an OAuth 2 client ID created in your GCP project. You can find this under “OAuth 2.0 Client IDs” in the “APIs & Services” > “Credentials” section of the cloud console. When you click on this credential, you’ll find a client ID and client secret. These need to be provided to Kubernetes as secrets so they can be used by a BackendConfig for configuring IAP. Apply the secrets to Kubernetes with the following command, replacing “xxx” with the respective credentials:

$ kubectl create secret generic iap-oauth-client-id \
--from-literal=client_id=xxx \
--from-literal=client_secret=xxx

BackendConfig is a Kubernetes custom resource used to configure ingress in GKE. This includes features such as IAP, Cloud CDN, Cloud Armor, and others. Apply the following BackendConfig configuration using kubectl, which will enable IAP and associate it with your OAuth client credentials:

We also need to ensure there are service ports associated with the BackendConfig in order to trigger turning on IAP. One way to do this is to make all ports for the service default to the BackendConfig, which is done by setting the “beta.cloud.google.com/backend-config” annotation to “{“default”: “config-default”}” in the service resource. See below for the updated service configuration.

Once you’ve applied the annotation to the service, wait a couple minutes for the infrastructure to settle. IAP should now be working. You’ll need to assign the “IAP-secured Web App User” role in IAP to any users or groups who should have access to the application. Upon accessing the application, you should now be greeted with a login screen.

Your Kubernetes workload is now secured by IAP! Do note that VPC firewall rules can be configured to bypass IAP, such as rules that allow traffic internal to your VPC or GKE cluster. IAP will provide a warning indicating which firewall rules allow bypassing it.

For an extra layer of security, IAP sets signed headers on inbound requests which can be verified by the application. This is helpful in the event that IAP is accidentally disabled or misconfigured or if firewall rules are improperly set.

Together with GCLB and GCP-managed certificates, IAP provides a great solution for serving and securing internal applications that can be accessed anywhere without the need for a VPN.